How to Automatically Make Rimworld Timelapses With FFMPEG
I’ve recently gotten (back) into playing Rimworld, and I wanted to make some nice timelapses of my bases. To that end, I realized I can use the Progress Renderer mod + FFMPEG to easily create MP4 video timelapses.
1. Setup Progress Renderer
First you’ll want to install the Progress Renderer mod. Be careful, as there are two versions on Steam Workshop. This is the correct version and this is the outdated version. Note that it depends on the Harmony mod.
Next, open up your game, and go to “Options > Mod options > Progress Renderer”.

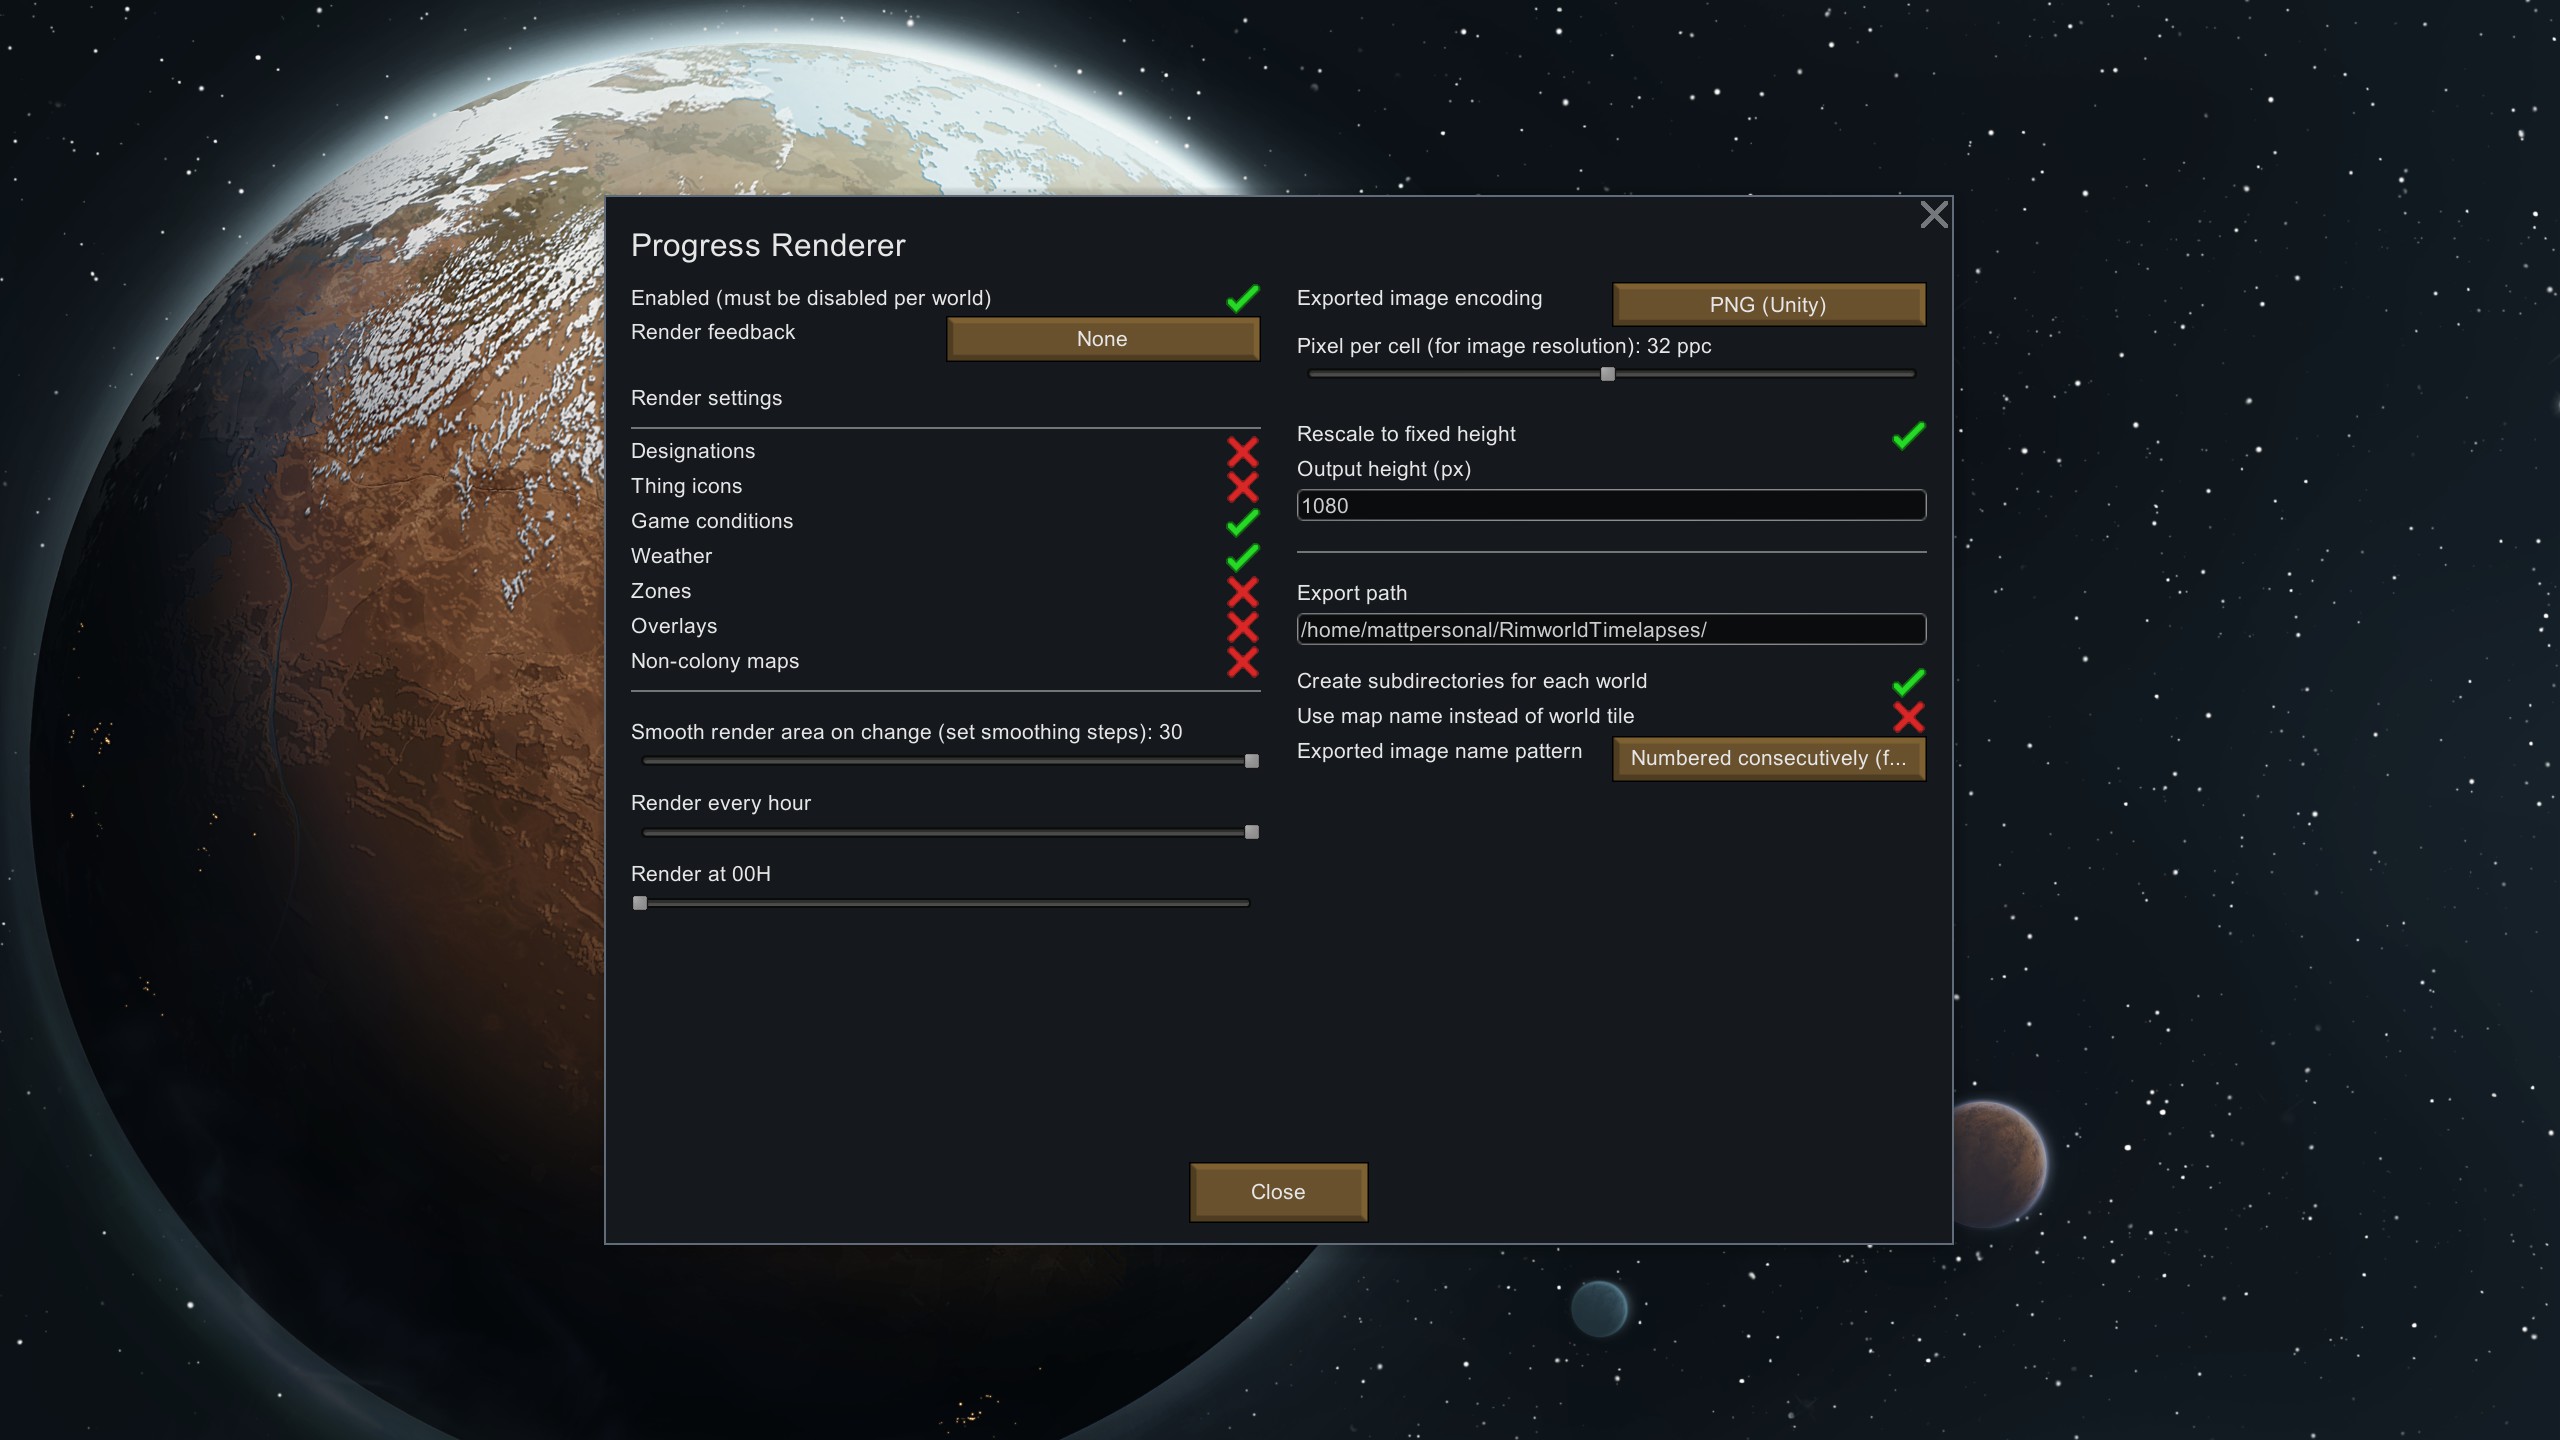
These are my preferred settings.
- Render Feedback: None
- Maybe set it to Message your first time to ensure it’s working, but then disable to reduce spam.
- Render Settings: Game Conditions + Weather
- Smoothing Steps: 30
- This gives a nice smooth transition between render areas.
- Render Every: Hour
- Time in Rimworld has 24 ingame hours in every ingame day, and 60 ingame days for every ingame year.
- So setting this to every hour will give us 24 images per ingame day, or 1,440 images per ingame year.
- In my experience, each image is roughly 2MB. That means roughly 48MB per ingame day. OR roughly 2.8GB per ingame year.
- So if you plan on doing a 10 ingame year run, have at least 28 GB free on your drive.
- NOTE: If you have a large base, the image sizes can grow considerably larger, so plan ahead!
- Render At: 00H
- This acts as an offset, so isn’t needed for us.
- It can be useful for creating only daytime timelapses if your frequency is daily or fewer.
- Encoding: PNG
- Pixel Per Cell: 32ppc
- Rescale to Fixed Height: ON
- Output Height: 1080px
- Export Path: Wherever You Want
- Note: I run the game on Linux under Flatpak. This means my directory is actually located in
/home/mattpersonal/.var/app/com.valvesoftware.Steam/RimworldTimelapses
- Note: I run the game on Linux under Flatpak. This means my directory is actually located in
- Subdirectories: ON
- Use Map Name: OFF
- Name Pattern: Numbered Consecutively
I’ve found they strike a good balance of smoothness, quality, and space.
2. Play The Game
Once you have these settings set, start your Rimworld map. By default, Progress Renderer will take renders of your entire map. If you want to zoom in on a specific section, open the “Orders” menu. From there, you can place corner markers that denote the area for Progress Renderer to capture. Place one marker in the lower left corner, then another in the upper right corner.
NOTE: Don’t put more than 2 markers on your map!
Progress Render will then slowly zoom to your new render area. The setting of 30 for smoothing step means that it’ll take a little over an ingame day for it to shift.
If you want to zoom back out to the entire map, just remove both markers.
3. Install FFMPEG
Once you’ve played the game for a bit, and are ready to make your timelapse, the next step is to install FFMPEG.
4. Create the Timelapse
Once FFMPEG is installed, open a new Terminal window (MacOS / Linux) or Command Prompt (Windows).
Use the cd command to navigate to the folder that contains your Progress Renderer images. (Guide for if you’re new to command prompt.)
Once you’re in that folder, you can run the following FFMPEG command:
ffmpeg -framerate 24 -start_number 0 -reinit_filter 0 -pattern_type glob -i "./*.png" -vf "scale=1920:1080:force_original_aspect_ratio=decrease:eval=frame,pad=1920:1080:-1:-1:eval=frame" -r 25 -c:v libx264 -crf 17 -pix_fmt yuv420p timelapsename.mp4
NOTE: Feel free to replace timelapsename.mp4 with whatever you want + .mp4
The above command uses glob pattern matching to find all .png files in the current folder.
If then takes those PNGs and covnerts them into an MP4 video file.
The -framerate 24 makes the video run at 24 FPS. Since we have 1 image per ingame hour, and 24 ingame hours per ingame day, this means 1 second of our timelapse equals 1 ingame day. Since an ingame year is 60 days, this means that an ingame year nicely lines up to be exactly a minute in our timelapse. This means that a 10 year or 20 year base will produce a 10 minute or 20 minute video… which I think is a good length! Feel free to adjust this however if you want to lengthen / shorten your video.
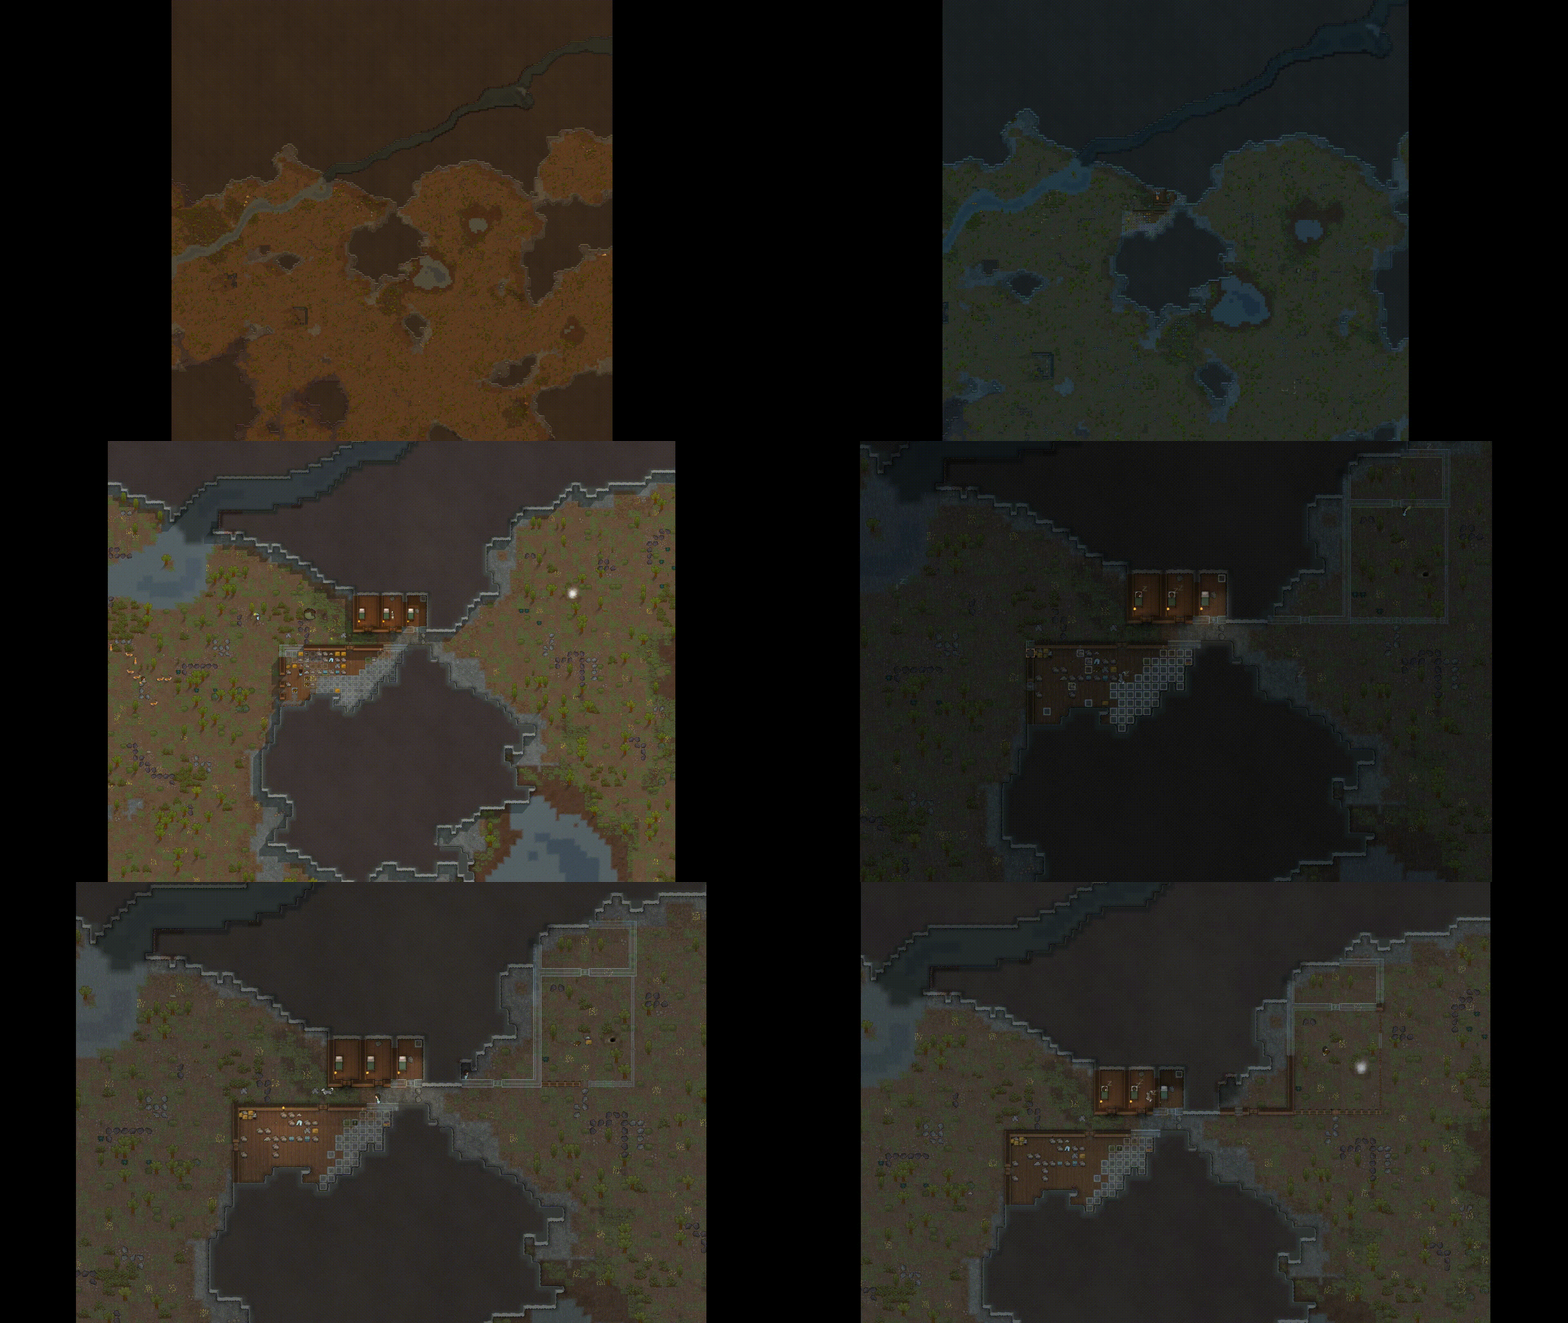
The really long -vf parameter just tells FFMPEG to make the output 1920x1080, regardless of the sizes of the input images. This is important, because as we noted above, Progress Renderer can be told to render any size or shape area in your map. That means your images are NOT all going to be the same size or aspect ratio. Therefore, this parameter will fix the height of the video to 1080, and pad the sides with black bars to fill in the horizontal width. It also means that as your viewing area grows and shrinks, the black padding bars will also grow and shrink. Handy!
NOTE: This is why we have progress renderer output to a fixed height of 1080px.
NOTE: If you don’t like the black bars, then make sure your render area is always a 16:9 aspect ratio. (AKA 1.77) Progress Renderer will tell you this whenever you change the area.
5. Enjoy Your Timelapse
That’s it! Your timelapse MP4 video file is now ready! Feel free to upload it to YouTube, or Reddit.
If you want to turn it into a GIF, you can also do that with this FFMPEG command:
ffmpeg -i timelapsename.mp4 timelapsename.gif
Enjoy!

Update: I found another great post similar to this one with more advanced techniques here.